CM-FX6: Android: Getting started
Preconditions
- PC workstation
- CM-FX6 evaluation kit properly connected
- SD-Card with minimal capacity of 2GB, which will serve as the boot source
Creating a bootable SD-Card
- Download the compressed SD-Card image.
Ensure the integrity of the downloaded file by testing its MD5 summary. - Unzip the file in order to get the dd image.
- Copy the bootable image to the SD-Card following the instructions provided for selection of operating systems.
If you are running Linux, you might prefer the instructions below:
# dd if=cmfx6-android.img of=/dev/sdc
Boot
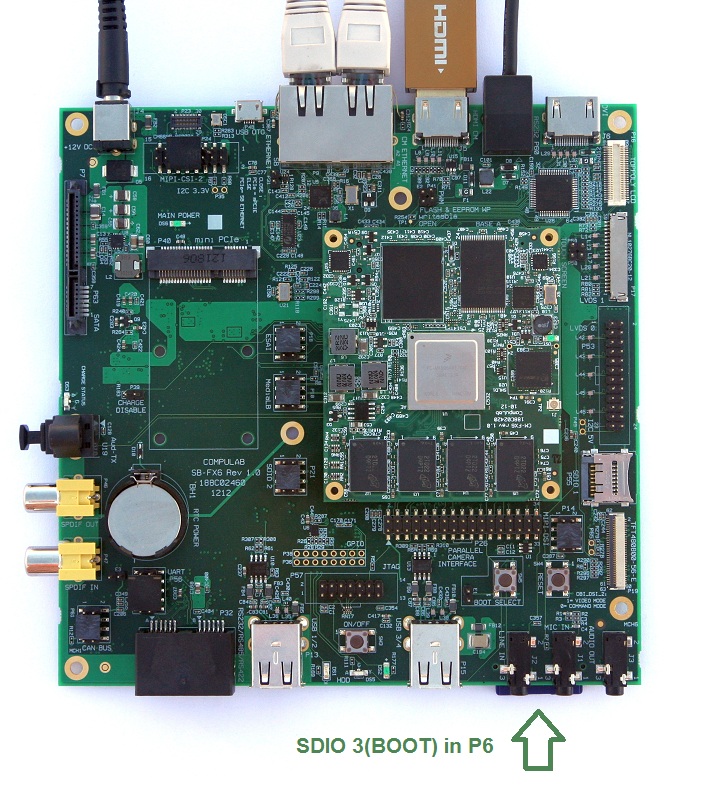
- Insert the bootable SD-Card into P6 SD-Card slot.
- Power on.
Press RESET while BOOT SELECT is pressed. - Within 3 seconds the device should start booting into Android.
Within 60 seconds the HDMI display should start showing signs of life.
Advanced boot
By default CM-FX6 uses HDMI display with 1080p resolution.
This can be changed by providing alternate boot arguments to the Android/Linux kernel.
- Connect to the serial console as explained in the Development section.
- Press ENTER to stop the countdown.
   setenv videomode video=mxcfb0:dev=ldb,if=RGB24,1280x720M@60 fbmem=28M      # DVI display with 720p resolution
   setenv videomode video=mxcfb0:dev=hdmi,if=RGB32,1920x1080M@60 fbmem=48M    # default video mode
- Type in boot to proceed to kernel boot overriding default video mode.
Upon first boot
- Any Android system performs first boot ceremony where it introduces its main controls - CompuLab's release is no different.
- With no delay, enable Settings->Developer options->Stay awake (...) while charging - this will prevent the device from entering not yet well managed, hard to wake from sleep.